Glass-Like Edges on Veg-Tan Leather: The Tokonole Guide
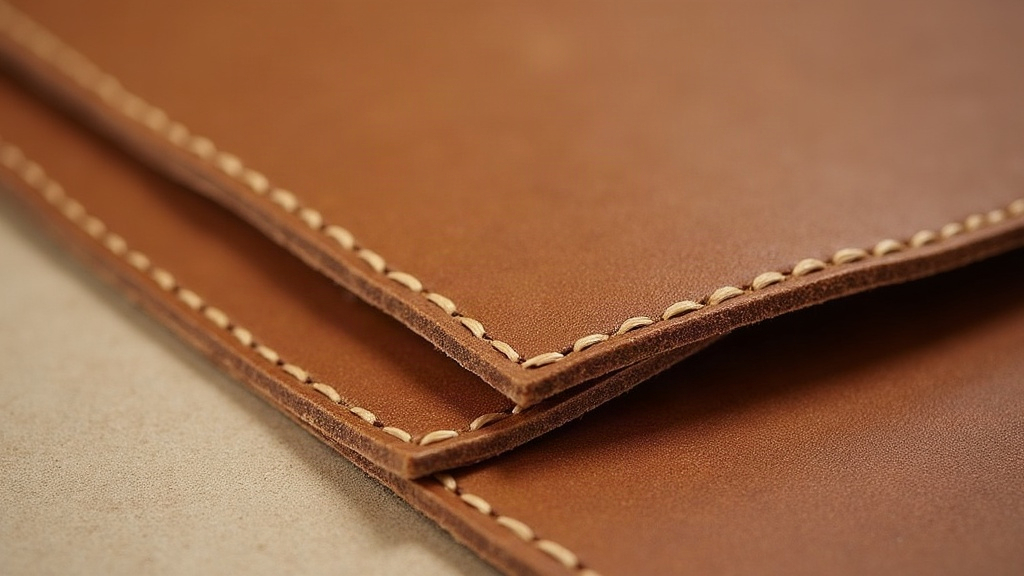
Nothing lifts a leather project quite like a perfectly smooth, glossy edge. If you’ve been wondering how to get glass-like edges on veg-tan leather using Tokonole and canvas, you’re in the right place. Leathercrafters who sell their work swear by this combo, and for good reason: it gives you a durable, mirror finish without the mess of edge paint dripping where it shouldn’t. Below, I’ll walk through the exact prep, sanding progression, and burnishing routine that turns raw, fuzzy edges into something that actually looks finished.
Why Choose Tokonole and Canvas?
Tokonole is a premium, water-based burnishing gum that comes out of Japan. Unlike saddle soap or old-school gum tragacanth, it’s loaded with natural waxes that bind the leather fibers together tightly while leaving behind a shine that isn’t sticky or tacky to the touch.
Heavy cotton canvas is the other half of the equation, and it’s the ideal material for generating friction. Wooden slickers get a lot of attention online, but push too hard with one and you’ll “mushroom” the edge, basically bulging it out of shape. Canvas, on the other hand, wraps around the bevel naturally. It generates just enough heat to melt the waxes in the Tokonole without crushing the leather’s fiber structure.
The Step-by-Step Workflow for Mirror Edges
Here’s the honest truth: getting a flawless edge is about 90% prep work and maybe 10% actual burnishing. Skip the groundwork and you’ll end up with something dull, patchy, or fuzzy no matter how much you rub canvas on it.
Step 1: The Perfect Cut and Bevel
Your edge needs to be completely flush before burnishing even enters the picture.
- Cut with a razor-sharp blade at a true 90-degree angle. If you’re joining two pieces, glue them securely right up to the edge first, then shave off a thin sliver from the combined edge so they line up perfectly flush, no ledges, no gaps.
- Run a sharp edge beveler along both the grain (top) and flesh (bottom) sides to knock off those sharp corners. Skip this and the edge will mushroom the second you apply friction.
Step 2: Progressive Sanding (The Secret Sauce)
You can’t force a bumpy, uneven edge into submission with burnishing alone. Sanding is where the real work happens, and most people rush through it.
- Start with 220-grit on a sanding block to knock down high spots and glue lines. Sand in one direction only; going back and forth tears the fibers instead of smoothing them.
- Step up to 400-grit, then 600-grit, then 800-grit.
- Between each grit, wipe the edge with a slightly damp cloth. This clears dust and gently raises the fibers so the next grit has something fresh to work on. By the time you hit 800-grit, the edge should already feel noticeably smooth under your fingertip, almost like suede.
Step 3: Applying the Tokonole
With burnishing compound, less really is more.
- Grab an awl, a spreader tool, or just your fingertip, and apply a thin, even layer of Tokonole along the edge. Think of it like applying a thin coat of varnish, not frosting a cake.
- Keep it off the grain side. Tokonole can resist dyes and finishes down the line, so if it slips onto the face of the leather, wipe it off right away.
- Give it 10 to 15 seconds to soak in a bit before you start burnishing. Rushing this step wastes the whole point of applying it.
Step 4: The Canvas Burnish
This is where the glass finish actually appears.
- Wrap a piece of heavy cotton canvas tightly around your index finger, like you’re about to clean a lens.
- Rub the canvas briskly back and forth along the edge. Speed matters here, not pressure. The rapid friction builds heat, and that heat is what melts the Tokonole and locks the fibers flat.
- Pay attention to the sound. At first it’ll sound “wet” or slightly squeaky. As the edge seals up, the sound shifts into a slick, higher-pitched glide. Once you hear and feel that smooth glide, stop immediately. Keep going past that point and you’ll actually undo your work, pulling fibers back up.
Step 5: The Final Polish (Optional)
Want an actual mirror? Push it one step further. Lightly wet-sand the burnished edge with 1000-grit or 1500-grit paper, using a tiny drop of Tokonole as lubricant so the paper glides instead of scratching. Wipe it clean, add one last micro-thin layer of Tokonole, and give it a fast final buff with a clean patch of canvas. The result: an edge that genuinely throws back light like polished stone.
Common Edge Finishing Mistakes to Avoid
- Mushrooming: Edge bulging out in the middle instead of staying flat? You’re pressing too hard. Let speed and friction do the job; your arm muscles shouldn’t be involved.
- Fibers pulling up: Fuzz showing up after burnishing usually means one of two things: the leather was too dry, or you stopped sanding before 800-grit. Don’t skip grits to save time.
- Uneven shine: Patchy Tokonole application or a crooked initial cut are almost always the cause. Go back to basics: a clean 90-degree cut, applied evenly before you touch the canvas.
Conclusion
Getting glass-like edges on veg-tan leather with Tokonole and canvas takes some patience, no way around that. But once you’ve done it a handful of times, the payoff is obvious. Focus on your sanding progression, trust the speed of the canvas over brute force, and your pieces will start looking like they came from a proper workshop rather than a kitchen table. Grab a scrap of veg-tan, run through these steps once, and you’ll see exactly what I mean.